Saturday, December 18, 2010

The One With the Reindeer Cupcakes

These little reindeer were inspired by what seems to be a very popular way of decorating cookies... but I made cupcakes into reindeer instead.


They are just chocolate cupcakes with vanilla frosting and brown food coloring. Chocolate chips for eyes and M&Ms for noses. The extra big Rold Gold Pretzel thins make the antlers. I think they need extra big antlers... regular pretzels would make them look like regular deer. And that is just not acceptable.

Here's Rudolf with his red nose.


And the whole sleigh team ready to dash away.

"Now, Dasher! Now, Dancer! Now, Prancer and Vixen!
On Comet! On, Cupid! On Donder and Blitzen!

Thursday, December 16, 2010

The One With the Decking of the Halls

I just love this time of year. And I love decorating for it. This year, I went with a colorful Christmas theme - mostly centered around green, blue and red.
The little nativity is a favorite. It is from Nicaragua. I wanted it to be focal, even though it is small, so I nestled it among some paper trees and beside a framed star I bought at a craft fair.
Now, decorating for Christmas is a little more difficult with a little one - all decorations must be up high and out of reach or childproof. This little Happy Holidays sign is perfect for our living room side tables as it can't really be hurt too badly. And the tin is form Target and should always be filled with cookies or candy... but then I would eat it all.
I snagged this little reindeer a few months ago in yearning for the holiday season. He's another favorite. And since our dining table is quite small, it's nice that I can make a centerpiece with him and some candles that is both festive and compact.
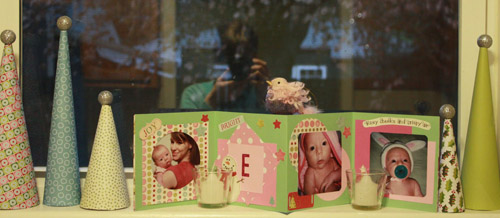
And this is the kitchen window. (My reflection is a nice touch, I think.) The photo collage was another craft fair find last year. I need to replace it with one made from this year's pictures, but I haven't gotten around to it yet.
And of course, no Christmas decorating is complete until Jingle Bugs is on the table... Ellie just loves that book.
I made the stockings myself using this pattern/tutorial for Elf Stockings from Sew4Home.com. The fabric line is "Colorful Christmas" by My Mind's Eye for Blake Riley. They may look a little limp at the moment... but they won't on Christmas eve!
This post could have also been titled "Decorating for Dollars" as nearly everything I used to decorate was either a gift or handmade from materials on sale. Target provided the little sparkly balls atop the trees (they were originally ornaments in the dollar section). To make the trees I recycled paper from last year and also purchased some more from Brenda Walton's Peppermint Twist Collection.
And while I was taking these pictures Ellie thought it must be time for a photoshoot of her as well. Look at those beautiful blue eyes. And notice the jingle bell she stole from a wreath.

Monday, November 29, 2010

Now Available at the Artisans for Nicaragua Craft Fair!

Mallory and I are participating in a fundraiser for the Nicaragua Immersion program at the University of Portland. We are selling the following items.

Flower hairpieces with a clip and pin back. You can wear them in your hair or on a jacket or even on a headband, as Ellie so nicely demonstrates below.


Snuggle Baby Blankets: Made of soft cuddle fabric on one side with a patterned flannel on the other and a satin ribbon trim. These blankets measure 1 sq. yard and are the perfect size to keep in the carseat for cold winter drives. They heat up quickly and keep little ones warm.


Clutches and makeup bags available in many different prints!


We will also be selling baked goods (like cupcakes, almond toffee, poppyseed muffins, pumpkin spice rice crisipies and more) and handmade cards.
Come by and see us in the Franz lobby all week long between 11:30am and 1:30pm!

Friday, November 26, 2010

The One With the Turkey Cupcakes

Last year, my nephew and godson, Cyril, was born on Thanksgiving Day. To celebrate his first birthday, I made some turkey cupcakes as he was having a Thanksgiving themed birthday party. Here's what they looked like:


Unfortunately, due to bad weather, they actually never made it to the birthday party. Now I have a bunch of turkey cupcakes lying around with no home. I hope that someday, however, he will at least appreciates the sentiment. I'll be sure to show him pictures so he can.


I got the idea from Hello, Cupcake, which is a great resource for cupcakes for all occasions. As usual, however, I changed some of the ingredients because some of the items used by the book's author are pretty hard to come by. So I usually make do with what can be found either in the cake decorating aisle of Michael's or the local grocery store. Here is what I used:

  • 24 regular and 24 mini Pumpkin cupcakes baked in white liners (see recipe below).
  • 2 cans vanilla frosting - set some aside for eyes in a small ziploc bag. To dye the rest the correct color, use brown, yellow and orange food coloring until you have a caramel color.
  • Gold pearlized sugar - roll the entire edge of the large cupcakes and the top edge of the minis for a feathery effect. (Hello, Cupcake calls for caramel jimmies which would also work well if you can find them.)
  • Candy corn for beaks and tail feathers.
  • Pizzelle cookies - these Italian cookies are quite thin and I found them in the bakery section of Fred Meyer. Any cookie with a scalloped edge would work, but a thin kind would be best. To make it work better, I broke out 1/3 of the cookie so that it was contoured to fit the top of the cupcake. Pipe 7 stripes of white frosting onto the cookie and add the candy corn for feathers.
  • To support the the cookie/tail feathers I cheated and poked a toothpick into the cupcake to lean the cookie on. I know it isn't edible, but truthfully, no one is just going to be biting into these anyway. So just warn your consumers that there is a toothpick in there and they will be able to easily remove it.
  • Red fruit leather cut into elongated tear drop shape for wattle.
  • White frosting (that you saved from earlier) and mini chocolate chips for eyes.

I had used a Pumpkin Spice Cupcake Recipe before that did not work, so here is what I did and it worked!

Pumpkin Cupcake Recipe:

2 boxes yellow cake mix
2 tsp Pumpkin Pie Spice
3/4 cup canned pumpkin
1 1/2 cups buttermilk
2/3 cups oil
7 eggs

Preheat oven to 350 degrees.
Put liners in cupcake tins. Combine all ingredients except eggs and blend well. Add the eggs one at a time, blending well after each addition. Pour into prepared liners until 2/3 full and bake for 15-20 minutes or until a toothpick inserted into the middle comes out clean and the tops are a nice and firm.

Makes 24 regular and 24 mini cupcakes.

Saturday, November 13, 2010

Dreaming of Christmas Cards...

It's that time of year again and I've been thinking about how I want to do our family Christmas cards this year.

This one is pretty sweet. And I like the snowy version below even better.


And although I'm a fan of this one, Steve says it isn't wintery enough. I guess that's what you get for living in Portland where there is no snow. We'll have to dress Ellie up in some winter gear and at least pretend there is snow for a photo shoot before these go to print.

And another one... mostly because I lack pictures of other babies to put in the template.


And then I just started playing around and making some for friends...


This is one I did last year to announce the birth of my nephew.

And this design was our Christmas card last year. I just updated it for fun.


So here's the thing: I want to continue to build my portfolio and would love to make YOUR family's holiday cards! That's right! I'm giving away 10 FREE holiday card designs. You would be responsible for all printing, etc. I would just be making the design. Really, seriously. You will be able to choose any of the designs above or get a whole new one if you give me some ideas of what you're hoping for.
To win one of the FREE designs, comment on this post or email me and we'll get something started!

Wishing you a happy holiday season,
Michelle

Monday, November 1, 2010

The One With the Leaf Lessons

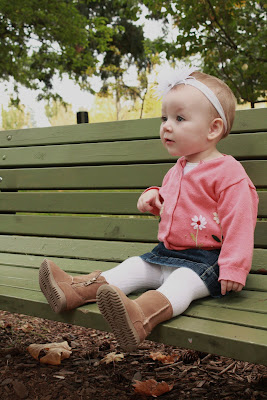
Ok not really... this is actually just a post of pictures from Ellie's autumn portraiture session (which was really just Mallory and me taking pictures to practice using our cameras). But it looks like she is learning a lot from a leaf in a few of these.


Here Ellie is screaming, "I love fall!" Well, at least that's what it looks like to me.


Friday, October 29, 2010

The One With the Cookie Monster Cupcakes

Who are you looking at?
Well, I'm not a big fan of the creepy and scary aspect of Halloween. In fact, to me, Halloween is just a big waste of time keeping us from celebrating Thanksgiving and Christmas even longer! Well, I guess it's fun to dress babies up like bumblebees (more on that later)...

So instead of making anything scary, for the Halloween festivities this weekend I made some Cookie Monster cupcakes.


And they're pretty easy:
  1. Make chocolate cupcakes (or whatever kind you like best).
  2. In a ziplock bag, set aside two spoonfuls of plain white vanilla frosting.
  3. Use blue food coloring to dye the remaining vanilla frosting (heads up: it is going to require a lot of food coloring to get the frosting this color - I had to use almost an entire bottle of dye for one can of frosting).
  4. From a cake decorating set, use the grass tip to create the fur: start in the middle and work your way toward the edges in a circular pattern.
  5. Refrigerate the cupcakes for about half an hour to let the frosting stiffen. You don't have to do this, but it makes doing the eyes a little easier.
  6. Cut a tiny piece of the corner of your ziplock bag to make the eyes out of white frosting. You can use a toothpick to keep the edges clean.
  7. Put mini chocolate chips in then center of your white frosting for the pupils.
  8. Voila! Enjoy your cute cupcakes!

And of course, this post wouldn't be complete without some pictures of Addi enjoying the cupcakes!

Wednesday, October 20, 2010

The One With the Pumpkin Cupcakes

It's Steve's birthday today. Since his birthday is close to Halloween, he has always loved fall and all Halloweeny things. So for his birthday I made him these pumpkin cupcakes.

Not only do they look like pumpkins, they taste pumpkiny, too! They are pumpkin spice and quite delicious... however I haven't quite perfected the recipe, so I'll have to share that later. But I will share how I decorated them like pumpkins.
They were baked in white paper liners. I made a dozen large cupcakes and 24 mini cupcakes. I used orange food coloring in vanilla frosting to ice the cupcakes. Then I dipped the cupcakes in orange sugar. To make the indentations of the cupcakes I used the remainder of the frosting, but with some added orange coloring to make it darker. The stems are cut pieces of Sour Patches green straws. The vines are made of Halloween green melting chips drizzled in curly-Qs on top of the patch collection.

The Other One With Valerie's Senior Pics

More of the lovely Valerie.
She was going for "Taylor Swift hair". I think it worked. Only her red hair is even prettier than Taylor's. (I think it is funny to refer to celebrities by their first name as if we're actually friends or something.)


I love the lighting in these pictures. Her hair is so glowy! She has the perfect coloring for autumn portraits.

Monday, October 18, 2010

The One With the Boston Cream Pie Cupcakes

I spent Ellie's afternoon nap getting back to the heart of this blog: cupcakes!
I love cream filled desserts of all kinds and so when I found this Boston Cream Pie cupcake recipe, I had to give it a try. And my goodness, they are delicious!

Here's the recipe:

1 box yellow cake mix, plus ingredients to prepare mix
1/2 cup French vanilla instant pudding and pie filling mix
2 cups milk
16 oz. milk chocolate frosting
  • Preheat the oven to 350 degrees and line a cupcake tin with cupcake liners.
  • Prepare cake mix according to package directions. Spoon batter into cupcake liners. Bake 15 to 20 minutes until golden brown and a toothpick inserted into the middle comes out clean. Cool in pan 10 minutes, remove to wire rack to cool completely.
  • Meanwhile, whisk pudding mix and milk in medium bowl until well blended. Cover and refrigerate.
  • Use the Williams-Sonoma Mechanical Pastry Bag with filling tip to insert pudding into the center of the cupcakes from the bottom.*
  • Frost cupcakes and enjoy!
*This is how I did it. You could also poke a small hole in the bottom of the cupcake with the tip of a knife. Spoon pudding into pastry bag fitted with a small round pastry tip. Place tip inside hole in cupcake; gently squeeze bag to fill cupcake with pudding.

I was really excited to use the pastry filling tip of my Mechanical Pastry Bag. It did the job, but as messily as possible. I have not been very satisfied with my Mechanical Pastry Bag from Williams-Sonoma, especially because I expect high quality when I purchase anything from them.

But the end result was delightful. Boston Cream Pie always makes me reminiscent of early college cafeteria days... and those are some wonderful memories.

Related Posts Plugin for WordPress, Blogger...