Showing posts with label Cakes. Show all posts

Thursday, September 18, 2014

The One With the "How To Train Your Dragon" Cake

Do you ever have days when you just feel like you'r super failing at being a mom. Maybe the kids are all upset or you're upset and you just can't set things right. Days when everyone is falling apart. On days like those I like to remind myself that there are a few things I do know how to do. One of them is baking cakes. And so I present to you Ellie's fifth birthday cake.

The title of this cake is: Hiccup Horrendous Haddock III and his dragon, Toothless, flying through the isles of Berk at sunset. Featuring cotton candy clouds and rock formations made of Hershey's chocolate and Skor bars.

Ellie decided a month or so ago that she wanted a "How To Train Your Dragons" birthday party theme. Well, I'm not one for buying all those expensive and ultimately useless decorations for parties, but I do like to make cakes according to the chosen theme. When she said she wanted a cake with Hiccup and Toothless I immediately thought of the scene where they are flying through the isle rock formations at sunset. I think Astrid is with them and she reaches up and touches a pink cloud. It's such a beautiful scene and I thought that if I was going to have to do something with dragons, it might as well still be pretty. So eventually the idea evolved to making a cake that looked like the sunset. I think it turned out pretty well. 


I followed this recipe by Bakerella for the cake. I was initially disheartened when Ellie said she wanted a white cake with chocolate chips in it, because I am a chocolate cake girl all the way. And also because I usually find white cakes to be really dry and just, umm, gross. I was pleasantly surprised at how well this one turned out. I used the sugar water spray method that she recommends, and it worked splendidly.  If you must eat a white cake, I suggest this one. (Or maybe this one, although it is very rich and therefore I didn't want three layers of it for a kid's birthday party.) For the frosting, I came up with my own whipped buttercream frosting recipe, similar to the one I used for Olivia's Perfect Birthday Party Cake, but without cocoa.

Whipped Buttercream Frosting
Makes enough for one 9-inch, 3-layer cake

1 cup (2 sticks) butter, at room temperature
2 pounds powdered sugar
1 Tablespoon vanilla extract
1/4-1/3 cups whipping cream

With an electric mixer on low, cream the butter. Slowly incorporate the powdered sugar, in four or five increments, beating on low the entire time. Add the vanilla and 1/4 cup whipping cream and beat to incorporate. Once mixture is smooth, turn your beater's speed up slowly until you are beating on high. Beat until frosting fluffs up and resembles whipped cream, 3-5 minutes. You can add more whipping cream if you want it to be lighter or if you need more frosting (the whipped cream adds volume). For this particular project, you want your frosting to have enough substance to hold onto the chocolate candy pieces. For other projects, you may prefer a lighter, fluffier frosting.
After baking and cooling the cake layers, I cut off the rounded tops and assembled them with the whipped buttercream frosting. I separated out about a quarter of the remaining frosting and set it aside in a small bowl. With the other three-quarters, I used food coloring to dye it pink. I frosted the top and down the side one layer with the pink frosting, making whispy sideways strokes with a decorating knife. I added blue dye to the pink frosting to make the purple for the middle layer of cake. I wanted to create an ombre effect like sunsets usually are - they start out light and pink and darken until they are blue at the ocean. After the middle layer was done, I used the remaining uncolored quarter of frosting and dyed it blue for the waves. When mixing the blue dye in, it's okay to leave some white streaks in the frosting to resemble frothy waves. I whipped this frosting upwards to look like ocean waves.
I put the cake in the refrigerator overnight, but if you don't have time for that, let the frosting dry out a little bit, about an hour or two, before breaking up pieces of Hershey's chocolate bars and Skor or Heath bars and pressing them into the frosting in the pattern of cliff and rock formations. I started at the bottom of the cake and worked upwards so that the top pieces would have something to support them. I saved the biggest pieces for the tops of the rocks so they could stick up above the cake top a bit. Just before the party started, I added cotton candy clouds by sticking various size pieces into the pink frosting. It looked all beautiful and wispy for a little bit before the cotton candy absorbed some moisture from the frosting and crystalized. That made it darken and flatten out, but it was still really pretty and sunsety. (You can see it in some of the pictures.)
Finally I topped the cake with a toy Toothless and Hiccup, which Ellie can play with now that this cake has been eaten.
I felt very proud of how this turned out. Mostly because it was actually pretty simple to do, once I wrapped my head around the idea. I am all about cakes that look super impressive, but are actually relatively easy to accomplish. Those kinds of cakes make me happy. And I think it made this little five-year-old pretty happy, too. 

Wednesday, July 30, 2014

The One With the Strawberry Shortcake and Chocolate Bourbon Sauce

This is one of my favorite summer treats to make. It's an adaptation of a recipe from Emeril Lagasse's strawberry shortcake with a bourbon sauce by Craving Chronicles. We had it a few weeks ago at book club. (Book club days are my favorite days.)

Strawberry Shortcake
Serves 10-12
  • 1 cup butter, melted and cooled
  • 6 eggs, at room temperature
  • 2 Tablespoons milk
  • 3 1/3 cups sugar
  • 2 cups whole wheat pastry flour
  • 2 teaspoons baking powder
  • 3 pounds strawberries, rinsed and sliced
  • 1/2 cup orange liqueur (like Grand Marnier)
  • 2 1/2 cups whipping cream
  • 5 Tablespoons powdered sugar
  • 2 teaspoons vanilla extract 

Preheat oven to 375 degrees and grease a 9x13 inch glass baking dish with butter. Set aside.

Beat together eggs and milk with an electric mixer until frothy. Add 1 1/3 cups sugar and beat on high for 7 to 10 minutes, until thick and pale yellow.

In a separate bowl, sift together flour and baking powder. Gently fold together the flour mixture and the egg mixture. Carefully stir in the melted and cooled butter. Pour into baking dish and bake for about 30 minutes, until cake is risen and golden brown and a fork inserted into the middle comes out clean. Let stand at room temperature to cool.

In a bowl with a sealable lid, combine strawberries, orange liqueur and 2 cups sugar. Close the lid tightly and shake everything together until well combined. Let stand at room temperature for 15 minutes, shaking or stirring every so often, until sugar is dissolved. Store in refrigerator until ready to serve the dessert.

Whip cream on high with an electric mixer until thick. Add vanilla and powdered sugar and continue to whip until stiff peaks form when you lift out the beaters. Keep whipped cream refrigerated until ready to serve.

Chocolate Bourbon Sauce
  • 2/3 cup whipping cream
  • 2 Tablespoons packed brown sugar
  • 1 cup semisweet chocolate chips
  • 1 tablespoon bourbon or whiskey
  • 2 teaspoons vanilla extract
In a small sauce pan over medium heat, combine cream and brown sugar. Stir until sugar dissolves and cream just starts to boil. Remove from heat and stir in chocolate chips until melted. Stir in bourbon and vanilla until smooth. 

To assemble:
Cut shortcake into 1 inch squares and divide evenly between serving dishes. Smother in strawberry syrup. Scoop plenty of whipped cream on top and finally drizzle with chocolate bourbon sauce and garnish with additional strawberries, if desired.


Friday, March 7, 2014

The One With the Perfect Birthday Party Cake (With Whipped Chocolate Buttercream Frosting)

Last weekend for Olivia's third birthday party I made this Perfect Birthday Party Cake. I've made a lot of delicious desserts in my day, but this one takes the cake. (Get it? Haha.)


Anyway, I found this recipe and tried it with my sister a few weeks ago for my birthday. And it was awesome. So I made a few improvements, and served it at Liv's birthday party. It was such a fun time! Steve's family got snowed in and couldn't make it, so we called up our friends at the last minute to come eat food and cake with us and I think it was the best birthday party yet! (Which either means we're really lame or our friends are really cool. I'm going to go ahead and hope it's the latter.) We even lost power due to the storm, but Liv and all her little friends just kept playing. And reading books by candlelight. And examining the globe collection. It was lovely.


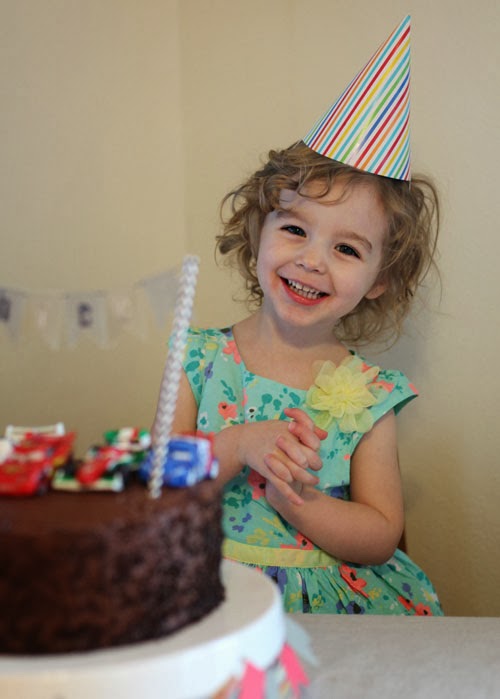
Because Olivia loves Lightning McQueen so much, I wanted to give her a Lightning themed cake. So I found some race car cake toppers online and they were the perfect thing. Although she was a little sad when she saw the cake but couldn't eat it until her party. I told her she had to wait for her friends to come. So when her first guests arrived, she opened the door for them and then ran over to her cake and said, "My friends are here! Let's eat my cake!" When she finally got some, I don't think she was disappointed.


Perfect Birthday Party Cake
Makes one double-layer 9 inch cake
  • 1 1/2 cups all-purpose flour
  • 1 1/2 cups sugar
  • 1 cup unsweetened cocoa powder
  • 1/2 Tablespoon baking soda
  • 1/2 Tablespoon baking powder
  • 1 teaspoon salt
  • 2 Tablespoons apple cider vinegar
  • 3/4 cup minus 2 Tablespoons milk
  • 2 eggs, at room temperature
  • 1/4 cup vanilla Greek yogurt
  • 1/2 cup vegetable oil
  • 1 Tablespoon vanilla extract
  • 3/4 cup hot, strong coffee
  • 1/2 cup mini semisweet chocolate chips

In a medium-size bowl, combine flour, sugar, cocoa powder, baking soda, baking powder and salt. Sift together with a fork and set aside.

In a liquid measuring cup, pour in 2 Tablespoons apple cider vinegar. Add milk until you have reached the 3/4 cup mark. Set aside.

With a mixer, beat eggs. Add vinegar and milk, yogurt, vegetable oil and vanilla extract. Beat until well combined. Add the dry ingredients in four increments, stirring well between each addition. Add the hot coffee and stir to combine. Add the mini chocolate chips and stir to distribute evenly throughout the batter. 

Wrap the sides of each cake pan in a strip of wet cloth (like a torn dishtowel or an old t-shirt.) (This added moisture will help keep your cake from rising so much in the center, so you won't have to worry about cutting off the rounded cake top.)  

Divide your batter between the two prepared cake pans and bake for 20-25 minutes, until a toothpick inserted into the center of each cake layer comes out clean. Let the layers cool completely in their pans before assembling your cake. 

Whipped Chocolate Buttercream Frosting
  • 2 cups (4 cubes) butter, at room temperature
  • 4 cups powdered sugar
  • 1 cup unsweetened cocoa powder
  • 1 Tablespoon vanilla extract
  • 1/4 cup whipping cream (plus a little more, if necessary) 
In the bowl of a stand mixer (or by hand with an electric mixer), soften the butter on low speed. (Do not turn your mixer on too high or air will get into your frosting and create bubbles.) Once your butter is very maleable, add the powdered sugar and cocoa powder, one cup at a time, stirring slowly and thoroughly between each new addition. Add the vanilla and stir. Add the whipping cream and stir on medium for about ten minutes, until frosting is light and fluffy. The longer you go, the more whipped the cream will get, making the frosting that much more delicious.

If it seems that your frosting is too thick and won't be easily frosted with, add more whipping cream, a Tablespoon at a time, until you reach your desired consistency.

Assemble your cake with a layer of frosting in the middle, and chocolate sprinkles to top it off!


At the end of her party, I asked Olivia what her favorite part was and she said, "Eating cake." I think she and I are going to get along just fine.

Thursday, October 4, 2012

The One With Ellie's Third Birthday Party

O hey. Remember me? Yeah, I used to write this blog before the epic summer of craziness. And to be honest, I don't know when I'll be back to posting regularly, but I thought I'd still stop by and show you the cuteness that was Ellie's third birthday party.

That's right. Ellie is three. It is crazy. She is just so much fun these days. It's sometimes a little strange to me how much of a person she is. How she can tell me stories of things that happened to her. How she can look back at all the pictures on her Instagram wall (see below) and recount the stories of going there or doing that. She is just very wonderful. And I think she really, really loved having a birthday and being special and having a party and eating cake.
Picture courtesy of Mallory Phelan.

Picture courtesy of Mallory Phelan.
 
Picture courtesy of Stephanie Deever.
Picture courtesy of Mallory Phelan.
Blowing out candles is Ellie's favorite thing. As is singing "Happy Birthday." When I told her it was time to sing she wasted no time in starting to sing the Happy Birthday song to herself. Everyone else just had to join in.

Also, the greatest form of entertainment at the party was the rock piles in our backyard. Apparently way cooler to children than any of the awesome food. Except maybe for the kettle corn. That was a big hit.

Now that she is finally old enough to have a say, I really wanted her party to be all about things she really likes. So I made the menu around some of her favorite foods (and, admittedly, some of mine). And she even helped decorate the cupcakes. And she definitely helped a lot with quality control. She was great at sampling everything to make sure it was up to standard. Especially the frosting.

Menu:

Friday, July 27, 2012

The One With the Ombre Vanilla Speckled Cake

Mallory and I have been taking a calligraphy class these past few weeks. It's so much fun. And hard work. Man, sometimes I just feel like my letters have little minds of their own. But I'm working on reigning them in. (More later? Perhaps, if I ever make anything good enough to show you.)

Anyway, at the beginning of our class we realized one of our classmates, Megan, had been in our cake class last summer. As we reminisced about cake class, our calligraphy teacher let it (subtly) be know that she had a birthday at the end of the month and she had always wanted a cool cake with flowers on it. Well, it's the end of the month. So last class, Mallory and I made her a cake and decorated it. We chose to do ombre roses for the frosting and it turned out soooo cool. Plus, the cake tasted pretty good, too.

I made the cake based off a Mrs. Field's recipe. This is one of my favorite cakes to take into the "unknown." It's perfect for presenting to a person or group whose tastes you might not know. Not everyone loves chocolate as much as I do (although I can't understand why), and some people have aversions to fruit and other things. So a vanilla speckled cake is really the way to go. It is rich and good, without being too chocolatey or not chocolatey enough. Your really can't go wrong with this baby.
 
Vanilla Speckled Cake
  • 3 cups minus 6 Tablespoons flour, thoroughly sifted
  • 1 1/4 teaspoons baking powder
  • 1/2 teaspoon baking soda
  • 1/2 teaspoon salt
  • 1/2 cup (1 stick) butter, softened
  • 1 1/2 cups packed light brown sugar
  • 1/4 cup vanilla Greek Yogurt
  • 6 large egg yolks
  • 2 teaspoons vanilla extract
  • 3/4 cup plus 2 Tablespoons milk, at room temperature
  • 6 ounces (1 cup) semisweet chocolate chips, finely chopped
Preheat oven to 350. Prepare two 9-inch cake pans and set aside. 
In a medium bowl, use a fork to sift together flour, baking powder, baking soda and salt. Set aside.
In a medium bowl with an electric mixer, cream together butter and sugar. Beat in the vanilla yogurt. Add the egg yolks one at at time, beating well between each. In three additions, alternately stir in the flour mixture and the milk, beating well to combine after each addition. Fold in the chopped chocolate. (Yes, it is actually important that you finely chop your chocolate chips, otherwise they will be too heavy and will all sink to the bottom of the cake while it is baking. And folding means that you use a spatula or wooden spoon to gently lift your batter in a cranking motion to incorporate the chocolate chips - it is not stirring.)

Divide the batter (it will be thick) between the two pans and spread until even. Bake for 30-35 minutes, until a fork inserted into the center comes out clean. Be careful not to overcook this cake - it is very dense and so burning it would really not work out well. Cool the cakes in their pans for 10 minutes and then on wire racks for 20 minutes. Level if necessary. (That's when you cut off the rounded top of the cakes so they will fit together well. You can do it with either a long knife or a cake leveler.)

To frost the cake, we made the regular vanilla buttercream frosting. Usually, I add some almond flavoring, but I didn't because I wanted to keep this one nice and vanilla-y.

Vanilla Buttercream Frosting
  • 1 cup (2 sticks) butter, at room temperature
  • 2 lbs powdered sugar
  • 1 Tablespoon clear vanilla extract
  • 4-6 Tablespoons milk or water*
  • Food coloring of your choice (we used Wilton's Violet)
In a medium mixing bowl, cream the butter on low. Still beating on low, gradually incorporate the powdered sugar and vanilla. Add the milk or water, one tablespoon at a time, until you have reached your desired consistency of frosting. Add a small amount of food coloring, still beating on low.
Once you are happy with the lightest shade of your ombre palette, ice the entire cake using a spatula or knife, so as to avoid icing holes where the roses don't quite line up.
Begin with a center rose and then add an outer circle of your lightest shade. Then add more food coloring to the frosting to darken it slightly and make the next circle of roses. Keep adding the food coloring after each row is done. This way, you don't have to worry about dying your different colors ahead of time and possibly running out of a certain shade... because that would be a very difficult mistake to fix.
The all-over roses were really quite simple (well, at least for Mallory. She's a rose pro. I'm still working on my certification.), but they turned out so beautifully. I think even if I am just frosting with chocolate icing from now on I am going to use this method, sans the ombre effect. It looks so finished and put together, and isn't really as time intensive as some other decorating methods.
Anyway, I just loved  how this cake turned out. Thanks, Mallory, for making my ombre rose icing dreams a reality. What would I do without you to execute all my perfect plans? I felt pretty cool walking into calligraphy class with this looking so awesome. :-)

Tuesday, July 24, 2012

The One With the Salted Caramel Soaked Chocolate Cake

Some of my "creations" are more like "happy accidents" in the kitchen. This particular one was inspired by a Martha Stewart recipe that took a few turns and ended up being this. But what can I say? Sometimes you get distracted by hanging out with cool people and can't be bothered to follow directions precisely.

Despite it's alterations from the golden standard, this cake turned out, well... divine. We had it for breakfast. Twice. After long nights staying up with girlfriends, you need a little something to get you going for the rest of the day. So eat it for breakfast. Or don't. It's good as a dessert, too.
Salted Caramel Soaked Chocolate Cake

For the cake
  • 1 box Devil's Food Chocolate Cake Mix
  • Eggs, water and oil as directed on box
For the salted caramel
  • 2 cups sugar
  • 1/2 cup water
  • 1 cup heavy whipping cream
  • 1/2 cup (1 stick) cold salted butter, chopped into large chunks
  • Sea salt  
  • Powdered sugar (optional) 
For the chocolate frosting
  • 1/4 cup plus 2 Tablespoons cocoa powder
  •  1/4 cup plus 2 Tablespoons warm water
  • 2 sticks butter, at room temperature
  • 1/2 cup powdered sugar
  • Sea salt
  • 1 pound (2 2/3 cups) chocolate chips
Preheat oven to 350 degrees. 

Prepare three 9-inch cake pans. Combine the cake mix as directed on the box and distribute batter evenly between the three pans. Bake as directed, about 25-28 minutes. Set aside to cool.

Prepare the caramel: in medium-sized non-stick pan, bring the sugar and water to a boil over medium-high heat, stirring only occasionally. Once the sugar is boiling, watch it carefully until it turns to a medium amber color. Remove from heat and immediately stir in the whipping cream (be careful - it will bubble up). Allow to cool for about 12 minutes and then stir in the butter chunks until completely dissolved. If the caramel is not thickening up at all, you may want to add some powdered sugar. You don't need it to be frosting consistency, as it is meant to soak into the cake. Add sea salt to taste.

Prepare the frosting: In a small bowl, whisk together the cocoa powder and water until completely dissolved. Using a mixer on medium speed, beat butter, powdered sugar and a generous pinch of sea salt until pale and fluffy. Melt chocolate chips in a microwave proof bowl for 30 seconds, and then in 10 second intervals, stirring between each. Gradually beat the melted chocolate and then the cocoa mixture into the butter and powdered sugar mixture. Once completely combined, let stand for 30 minutes to set up.

Level the cooled cakes. (That means: take off the rounded top so that each layer fits perfectly on top of the other. You can do this with a cake leveler or a long knife.) Pour the salted caramel over each of the layers before adding the next. Use a spatula to distribute evenly. Once all the layers are assembled and the frosting is ready, frost the cake. Allow it to set for about an hour so that the caramel soaks down into the cake, making it moist and delicious.
As you can see, the caramel soaks into the cake, it doesn't stay on top of each layer like a filling would, so in the end it doesn't even look like you had layers. This is the part where we started making up our own stuff very late at night and it turned out scrumptious.  However, if your caramel thickens up and doesn't soak through, I'm fairly certain that would taste pretty awesome as well. 

You could also garnish this baby with sea salt. Maybe even pink sea salt if you're fancy.
The best part of this cake is the sweet and salty (obviously), but also that the frosting is very decadent, but paired with a lighter cake. So it really is the best of all possible worlds. You should try it.

Friday, March 30, 2012

The One With Olivia's Birthday Cake

Pretty cakes make me happy. Pretty doable cakes make me even more happier. And cakes that use no fondant and only delicious buttercream frosting make me happier still.

The whole theme of Olivia's first birthday party was based around the fact that I wanted to make a cake like the one described in Mockingjay, the third book of the Hunger Games series by Suzanne Collins. If you're familiar with the series (and you should get to be if you aren't already), Peeta makes a cake for Annie and Finnick's wedding that is covered in blue and green waves to commemorate their home district, which is known for fishing. Here's the version I came up with - and Mallory executed for me. Lovely, isn't it?

I made your run-of-the-mill Betty Crocker Devil's Food cake for the tiers and then, frosted it with buttercream deliciousness.

Perfect Buttercream Frosting
  • 1 cup (2 sticks) butter, at room temperature
  • 2 lbs powdered sugar
  • 2 teaspoons almond extract
  • 2 teaspoons vanilla extract
  • 4-6 Tablespoons milk or water*
In a medium mixing bowl, cream the butter on low. Still beating on low, gradually incorporate the powdered sugar, almond and vanilla. Add the milk or water, one tablespoon at a time, until you have reached your desired consistency of frosting. If you want to color your frosting, do it now, still beating on low to keep air bubbles to a minimum.

The waves were created using a medium star tip. We used  Wilton Tip #18. 

*This is all about preference. Your frosting will still taste great no matter which of these you choose. I even use almond milk and that tastes great. If you use milk, however, be sure to keep your cake refrigerated.
**To make this a chocolate buttercream, add one cup cocoa powder, which is what the chocolate frosting pictured below is.

I shared this recipe at some of my favorite link parties! See the "Sharing" tab!

Tuesday, March 13, 2012

The One With the Almond Cake with Chocolate Buttercream Frosting

My friend, Allison, had her birthday party last weekend. And so I made her a modified version of the Pink Almond Party Cake. I made a double batch of the cake and then iced it with a Chocolate Buttercream Frosting... and here's the recipe, which makes a triple layer cake. I made the inside purple to match her party theme.

Almond Cake:
  • 2 boxes Betty Crocker Extra Moist White Cake Mix
  • 2 1/2 cups water
  • 2/3 cups vegetable oil
  • 6 egg whites
  • 4 teaspoons almond extract
  • Violet food coloring, plus just a tad of pink to brighten it up. 
Prepare your cake pans.  In a large mixing bowl, combine cake mixes, water, oil and egg whites, being careful not to over mix. Add almond extract and food coloring. Measure out your cake batter to make sure you use equal amounts in each layer. I believe, for my triple layer cake, I used 4 cups of batter in each layer, with some left over. Bake layers for 23-28 minutes. Let cakes cool in their pans for 10 minutes, and then on a wire rack for 1 hour. Once cakes have cooled completely, use a cake leveler to take off the rounded cake top so that the layers will fit together nicely.

Make your icing:

Chocolate Buttercream Frosting
  • 2 pounds powdered sugar
  • 1 cup (2 sticks) butter, at room temperature
  • 1/2 cup + 2 Tablespoons milk
  • 1/2 Tablespoons almond extract
  • 3/4 cups cocoa powder
Cream together butter, powdered sugar and 1/2 cup milk, beating on low to incorporate without getting too many air bubbles in the frosting. Add almond extract and cocoa powder. Add the remaining 2 tablespoons of milk only if you need it to make your frosting more workable and smooth. 

Put your cake together with the frosting in between each layer. I used Easter M&Ms for the border and edible butterflies by Wilton (available at Joann's or Michael's) for decoration.


Preheat the oven to 350 degrees.

Thursday, October 27, 2011

The One With the Cookies and Cream Cake

Steve loves cookies and cream. So a few weeks ago when Mallory made some Cookies and Cream Cupcakes for our book club meeting, I had the idea to make him a Cookies and Cream Cake for his birthday last Friday. It was delicious.


I made a standard fudgy chocolate cake mix and topped it with Cookies and Cream Frosting. It's amazing how addictive this stuff is.

Cookies and Cream Frosting:
  • 2 cups (4 sticks) butter, at room temperature
  • 1/4 cup heavy cream
  • 2 tsp vanilla
  • 2 pounds plus 1/2 cup (8 cups total) powdered sugar
  • 18 Oreos, finely crushed
Use a blender to combine butter, cream, vanilla and powdered sugar until smooth. Crush Oreos in a food processor or in a ziplock bag with a rolling pin. The finer, the better. 


I made a two standard 9-inch round cakes, with two layers each. I made one with Cookies and Cream frosting in the middle and on top. Then sprinkled generously with roughly (not finely) chopped Oreo bits. For the second cake I envisioned a Fudge-Dipped Oreo: A thick middle layer of Cookies and Cream frosting, with a Chocolate Buttercream frosting on the outside (see below). This was my favorite. Steve preferred the all Cookies and Cream one.


Chocolate Buttercream Frosting:
  • 1 pound (3 1/4 cups, loosely packed) powdered sugar
  • 1/2 cup butter, softened
  • 4 tablespoons water
  • 1 tsp vanilla
  • 1/2 cup cocoa powder
First, combine the butter and sugar, beating on low until completely blended. Add milk or water, vanilla and cocoa powder. If you want the frosting to be thinner, you can add another tablespoon or two of milk or water, beating on low until completely incorporated.

When you make this cake, which I highly recommend you do, be sure to keep it refrigerated between servings. 

Tuesday, September 20, 2011

The One With the Strawberry Lemonade Cake

In a desperate attempt to hold on to the fading rays of summer, and at Mallory's request, I made Strawberry Lemonade Cake for Ellie and Mallory's birthday party last weekend.
I was so busy getting everything ready and then it was consumed so quickly that this is literally the only real picture I got:

Yep. Pretty lame. Or pretty awesome if you consider that this was the only piece left after the party. Not too bad, if I do say so myself.

Anyway, the recipe was mostly inspired by Mallory's Lemon Poppyseed Cupcakes with Strawberry Buttercream Frosting. I just turned it into cake form and dubbed it "Strawberry Lemonade Cake" because 1) strawberry lemonade is one of my favorite things in the whole wide world and 2) it's a little easier to say.

You know I love dressed up cake mixes because they save me time, so I found this recipe for a lemon poppyseed cake and adapted it a little. And I modified Mallory's Strawberry Buttercream recipe per her suggestion. Here's how it goes:

Preheat oven to 350. Prep pans. (Here's how, if you need to know.)

For the Lemonade Cake:
  • 1 18 oz Yellow Cake Mix
  • 1 3.4 oz Instant Lemon Pudding Mix
  • 1 cup water
  • 1/2 cup vegetable oil
  • 4 eggs
  • 1 tablespoon poppyseed filing
Combine cake mix and dry pudding mix. Add water and vegetable oil and blend. Beat in eggs one at a time. Add poppyseed filling and stir to incorporate. Pour batter into prepared pans and bake for 25-30 minutes, until a fork or toothpick inserted into the middle comes out clean.

While the cake is baking and cooling, prepare the

Strawberry Buttercream Frosting:
  • 1/2 cup butter, softened
  • 3 3/4 cups powdered sugar (1 pound)
  • 1 cup pureed strawberries
  • 1 tsp vanilla
Use a food processor to puree strawberries. Blend butter and powdered sugar. Do not be alarmed if your mixture is not creamy, it doesn't have nearly enough liquid yet. Add your pureed strawberries and blend well. Add vanilla and mix on low for one minute.

If you don't want to have such a strong strawberry flavor you can use less of the pureed strawberries. If you're unsure, mix in a little at a time until you have the flavor you want. If you use less you will probably need to add milk or water by the tablespoon to make your frosting thin enough to spread easily on your cake. If your frosting gets too runny, you can always add more powdered sugar to thicken it up (although you will need a lot more powdered sugar to thicken it then you will need milk or water to thin it out).

Once your cake has cooled completely, spread the frosting in the middle layer and on top. Keep refrigerated until serving time!

Monday, September 12, 2011

The One With the Prepared Cake Pans How-To

Ever wondered how to prepare cake pans?

It has come to my attention that I often refer to certain processes like preparing cake pans without really saying how to do them. I sometimes take for granted that my mother taught me how to do these things, so I thought I'd make a little tutorial to show you how, too!

So, here's how to prepare cake pans!

The best way I have found for making sure your cake comes out just about perfectly is to prep your pans with butter, flour and parchment paper. It takes a few extra steps, but always saves a lot of hassle in the end.

First, choose your cake pan.

When it comes to round cakes, there are basically three types of pans. Nowadays, most cake pans are coated with a non-stick surface, but if you have older cake pans they may not be. Either way, you still need to prepare your pans. The three sets below are the ones I use most frequently.

1. 8 inch in diameter by 3 inch in height round, light cake pan: Whenever I use this pan, I just make this one pan, with 3 cups of batter in it. Once it has baked, I use a cake leveler to halve the cake and then frost between the two layers I have created. The straight edges of this cake pan make it the best for small, decorated cakes, like this one.

2. 9 inch round, light, coated non-stick cake pans: These are the two I use most often when I make the basic cakes posted on this blog like the Cherry Coke Chocolate Cake or the Pink Almond Party Cake. The slightly tapered edges are easily covered up by frosting.

3. Tiered round, dark, coated non-stick spring-form pans: I use these whenever I make a three-tiered cake, like the one I made for Ellie's first birthday party. However, dark coated pans tend to bake cakes that have a rounder top, as the dark coating attracts more heat, cooking the outside faster than the inside. This means you end up needing to cut off a lot of cake in order to get a flat surface for frosting. These spring-form pans are easily removed, but are really intended for use with pies, tarts, tortes and ice cream cakes.

So, the best cake pans are light and coated non-stick rounds. But anything you have available will also do the trick.

Now that you've chosen your pans, gather your supplies for preparing them. You will need:
  • Pans, obviously
  • Butter
  • Flour
  • Parchment paper
  • Pencil
  • Scissors

Now you're ready to prepare your pans: 

A. Take your pan and lay it on a piece of parchment paper. Use a pencil to trace around the outside of the pan.

B. Cut inside the line you just drew to create circle of parchment paper that will fit inside the bottom of your cake pan. Set aside.
C. Butter your pans. The easiest way to do this is to use the wrappers for the butter you will use in your cake batter. If you don't have these, you can use a paper towel or a scrap of parchment paper to spread your butter. Use about a 1/2 tablespoon of butter to fully coat your pan, bottom and sides.


D. Flour your pans. Drop a spoonful of flour into the buttered pans and gently shake it around until flour coats the bottom and sides. You will have excess flour, which you should tap out either into your next pan or into a bowl to use in the next step.


E. Now place the parchment paper circle into the bottom of the pan. Butter and flour the parchment paper like you did the entire pan earlier, being sure to tap off all extra flour into another pan or into a bowl to use it in your cake batter. 


And there you have it! Prepared cake pans, ready for your batter. It seems like a long process, but you will get the hang of it pretty quickly. Once you have baked your cake, you will be able to easily flip these over onto a wire rack to have the cakes cool. They will slide right out of the pans and then you can just peel the parchment paper off.

P.S. You can also use wax paper in place of parchment. No need to butter and flour the top of your wax paper (step E), but steps A-D are still important!

Additional tips:
If for some reason you are having difficulty getting your cake out of the pan, let it cool for 15 minutes and then use a plastic knife (not metal, as that will scratch your non-stick coating), to loosen the edges. Flip it over onto a rack or plate and gently shake it to loosen the bottom.

If you'd like to see more cake-making supplies besides the pans listed above, check out this post with my top cake making essentials.

Have any other questions about baking processes I refer to? Feel free to ask! I'd be happy to post a little demo on the how-to.
Related Posts Plugin for WordPress, Blogger...