Bear with me... this one has a lot of pictures.
This past week Michelle's daughter Ellie and Mallory celebrated their birthdays! The festivities began with brunch at the Original Pancake House in Portland.

And then we had a little party for Ellie on Saturday. She had a three-tiered, homemade, chocolate cake covered in colored melting wafers for the polka-dot effect.

And then there was a pink almond cake for Mallory who (gasp!) doesn't like chocolate cake.

Ellie didn't quite know how to approach her top tier of cake.


Which she also matched.
And here is the buffet table. We had bruschetta, a tortellini, bacon and broccoli salad, a chicken Caesar salad, a bacon, lettuce and tomato dip, turkey wraps and a raspberry lemonade punch. Everything was very, very delicious.

And here's a peak of the decorations. More about that later.


I put up all my favorite pictures from her first year using clothespins with pretty paper glued on top.


And then, of course, Ellie had to open her presents. She was very polite and read the cards first.


 I actually took these at a party celebrating Carly's baptism, but I just love the sentiment.

 In this one, Carly was smiling really big because her dad came over to entertain her. I love how much she loves him!


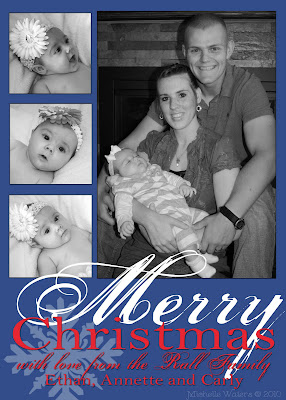
 And here is the Christmas card I put together for them.
 This part made me feel like a real artist because it reminded me of Michaelangelo's quote when asked about the statue of David, "How do you take a rough stone and make such beauty from it?" to which he replied, "I just carve away anything that isn't art." This project made me feel like I was carving away everything that wasn't the letters of the signs. Silly, I know, but it got me through the very long process.
 It took a few more rounds of touch-ups with white and black paint alternatively to perfect the signs. And finally I added a burgundy border. And here's a shot of what all the signs looked like lined up and waiting to be picked up by the owners of the Amity store.
 Sorry about the glare, the black paint was very shiny. One of these days I'm hoping to drop by the store and get pictures of them actually mounted. Until then, you'll just have to get the idea from the lineup above.
 Bear with me... this one has a lot of pictures.
 And then we had a little party for Ellie on Saturday. She had a three-tiered, homemade, chocolate cake covered in colored melting wafers for the polka-dot effect.
 And then there was a pink almond cake for Mallory who (gasp!) doesn't like chocolate cake.
 Ellie didn't quite know how to approach her top tier of cake.
 Which she also matched.
 And here's a peak of the decorations. More about that later.
 I put up all my favorite pictures from her first year using clothespins with pretty paper glued on top.

 And then, of course, Ellie had to open her presents. She was very polite and read the cards first.


