Sunday, July 29, 2012

Speechless Sunday

Via.
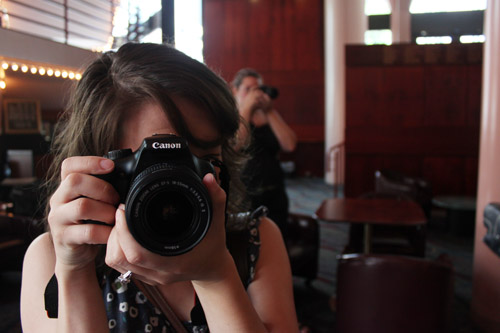
Happy London Olympics! I wish I had more time to watch the events, because the ones I have been watching are sooooo cool. Are you a fan?

P.S. My mom is getting married on Saturday! Yay! It is very exciting. But it also means I will be running around in a mad dash helping to get everything ready... so I won't have much to show you this week. Sorry. Hopefully I'll be back with a few photos and such soon!

Friday, July 27, 2012

The One With the Ombre Vanilla Speckled Cake

Mallory and I have been taking a calligraphy class these past few weeks. It's so much fun. And hard work. Man, sometimes I just feel like my letters have little minds of their own. But I'm working on reigning them in. (More later? Perhaps, if I ever make anything good enough to show you.)

Anyway, at the beginning of our class we realized one of our classmates, Megan, had been in our cake class last summer. As we reminisced about cake class, our calligraphy teacher let it (subtly) be know that she had a birthday at the end of the month and she had always wanted a cool cake with flowers on it. Well, it's the end of the month. So last class, Mallory and I made her a cake and decorated it. We chose to do ombre roses for the frosting and it turned out soooo cool. Plus, the cake tasted pretty good, too.

I made the cake based off a Mrs. Field's recipe. This is one of my favorite cakes to take into the "unknown." It's perfect for presenting to a person or group whose tastes you might not know. Not everyone loves chocolate as much as I do (although I can't understand why), and some people have aversions to fruit and other things. So a vanilla speckled cake is really the way to go. It is rich and good, without being too chocolatey or not chocolatey enough. Your really can't go wrong with this baby.
 
Vanilla Speckled Cake
  • 3 cups minus 6 Tablespoons flour, thoroughly sifted
  • 1 1/4 teaspoons baking powder
  • 1/2 teaspoon baking soda
  • 1/2 teaspoon salt
  • 1/2 cup (1 stick) butter, softened
  • 1 1/2 cups packed light brown sugar
  • 1/4 cup vanilla Greek Yogurt
  • 6 large egg yolks
  • 2 teaspoons vanilla extract
  • 3/4 cup plus 2 Tablespoons milk, at room temperature
  • 6 ounces (1 cup) semisweet chocolate chips, finely chopped
Preheat oven to 350. Prepare two 9-inch cake pans and set aside. 
In a medium bowl, use a fork to sift together flour, baking powder, baking soda and salt. Set aside.
In a medium bowl with an electric mixer, cream together butter and sugar. Beat in the vanilla yogurt. Add the egg yolks one at at time, beating well between each. In three additions, alternately stir in the flour mixture and the milk, beating well to combine after each addition. Fold in the chopped chocolate. (Yes, it is actually important that you finely chop your chocolate chips, otherwise they will be too heavy and will all sink to the bottom of the cake while it is baking. And folding means that you use a spatula or wooden spoon to gently lift your batter in a cranking motion to incorporate the chocolate chips - it is not stirring.)

Divide the batter (it will be thick) between the two pans and spread until even. Bake for 30-35 minutes, until a fork inserted into the center comes out clean. Be careful not to overcook this cake - it is very dense and so burning it would really not work out well. Cool the cakes in their pans for 10 minutes and then on wire racks for 20 minutes. Level if necessary. (That's when you cut off the rounded top of the cakes so they will fit together well. You can do it with either a long knife or a cake leveler.)

To frost the cake, we made the regular vanilla buttercream frosting. Usually, I add some almond flavoring, but I didn't because I wanted to keep this one nice and vanilla-y.

Vanilla Buttercream Frosting
  • 1 cup (2 sticks) butter, at room temperature
  • 2 lbs powdered sugar
  • 1 Tablespoon clear vanilla extract
  • 4-6 Tablespoons milk or water*
  • Food coloring of your choice (we used Wilton's Violet)
In a medium mixing bowl, cream the butter on low. Still beating on low, gradually incorporate the powdered sugar and vanilla. Add the milk or water, one tablespoon at a time, until you have reached your desired consistency of frosting. Add a small amount of food coloring, still beating on low.
Once you are happy with the lightest shade of your ombre palette, ice the entire cake using a spatula or knife, so as to avoid icing holes where the roses don't quite line up.
Begin with a center rose and then add an outer circle of your lightest shade. Then add more food coloring to the frosting to darken it slightly and make the next circle of roses. Keep adding the food coloring after each row is done. This way, you don't have to worry about dying your different colors ahead of time and possibly running out of a certain shade... because that would be a very difficult mistake to fix.
The all-over roses were really quite simple (well, at least for Mallory. She's a rose pro. I'm still working on my certification.), but they turned out so beautifully. I think even if I am just frosting with chocolate icing from now on I am going to use this method, sans the ombre effect. It looks so finished and put together, and isn't really as time intensive as some other decorating methods.
Anyway, I just loved  how this cake turned out. Thanks, Mallory, for making my ombre rose icing dreams a reality. What would I do without you to execute all my perfect plans? I felt pretty cool walking into calligraphy class with this looking so awesome. :-)

Tuesday, July 24, 2012

The One With the Salted Caramel Soaked Chocolate Cake

Some of my "creations" are more like "happy accidents" in the kitchen. This particular one was inspired by a Martha Stewart recipe that took a few turns and ended up being this. But what can I say? Sometimes you get distracted by hanging out with cool people and can't be bothered to follow directions precisely.

Despite it's alterations from the golden standard, this cake turned out, well... divine. We had it for breakfast. Twice. After long nights staying up with girlfriends, you need a little something to get you going for the rest of the day. So eat it for breakfast. Or don't. It's good as a dessert, too.
Salted Caramel Soaked Chocolate Cake

For the cake
  • 1 box Devil's Food Chocolate Cake Mix
  • Eggs, water and oil as directed on box
For the salted caramel
  • 2 cups sugar
  • 1/2 cup water
  • 1 cup heavy whipping cream
  • 1/2 cup (1 stick) cold salted butter, chopped into large chunks
  • Sea salt  
  • Powdered sugar (optional) 
For the chocolate frosting
  • 1/4 cup plus 2 Tablespoons cocoa powder
  •  1/4 cup plus 2 Tablespoons warm water
  • 2 sticks butter, at room temperature
  • 1/2 cup powdered sugar
  • Sea salt
  • 1 pound (2 2/3 cups) chocolate chips
Preheat oven to 350 degrees. 

Prepare three 9-inch cake pans. Combine the cake mix as directed on the box and distribute batter evenly between the three pans. Bake as directed, about 25-28 minutes. Set aside to cool.

Prepare the caramel: in medium-sized non-stick pan, bring the sugar and water to a boil over medium-high heat, stirring only occasionally. Once the sugar is boiling, watch it carefully until it turns to a medium amber color. Remove from heat and immediately stir in the whipping cream (be careful - it will bubble up). Allow to cool for about 12 minutes and then stir in the butter chunks until completely dissolved. If the caramel is not thickening up at all, you may want to add some powdered sugar. You don't need it to be frosting consistency, as it is meant to soak into the cake. Add sea salt to taste.

Prepare the frosting: In a small bowl, whisk together the cocoa powder and water until completely dissolved. Using a mixer on medium speed, beat butter, powdered sugar and a generous pinch of sea salt until pale and fluffy. Melt chocolate chips in a microwave proof bowl for 30 seconds, and then in 10 second intervals, stirring between each. Gradually beat the melted chocolate and then the cocoa mixture into the butter and powdered sugar mixture. Once completely combined, let stand for 30 minutes to set up.

Level the cooled cakes. (That means: take off the rounded top so that each layer fits perfectly on top of the other. You can do this with a cake leveler or a long knife.) Pour the salted caramel over each of the layers before adding the next. Use a spatula to distribute evenly. Once all the layers are assembled and the frosting is ready, frost the cake. Allow it to set for about an hour so that the caramel soaks down into the cake, making it moist and delicious.
As you can see, the caramel soaks into the cake, it doesn't stay on top of each layer like a filling would, so in the end it doesn't even look like you had layers. This is the part where we started making up our own stuff very late at night and it turned out scrumptious.  However, if your caramel thickens up and doesn't soak through, I'm fairly certain that would taste pretty awesome as well. 

You could also garnish this baby with sea salt. Maybe even pink sea salt if you're fancy.
The best part of this cake is the sweet and salty (obviously), but also that the frosting is very decadent, but paired with a lighter cake. So it really is the best of all possible worlds. You should try it.

Sunday, July 22, 2012

Speechless Sunday

Via.
Do you like surprises? I do. I think spontaneity is lots of fun. And one of my favorite things about summer is all the wiggle room for such spontaneity. Like walking to the food carts for wood fire pizza and salted caramel ice cream. Or girls' nights and sleepovers. Or fun snacks downtown and playing in the sand at Sand in the City. It's been a fun weekend.

And hopefully I'll have more posts for you sooner or later. <3

Tuesday, July 17, 2012

Tips for Roadtripping With Toddlers

We roadtrip with our toddler girls. A lot. At least in the last month we've been on the road quite a bit, and I feel like I'm really honing in on my skills as far as preparing for a smooth ride for everyone involved. Now, I'm not going to pretend we have no cranky moments, because we do. But, they are pretty limited, especially in the scheme of 7-9 hour drives. So, if you're thinking of traveling with toddlers soon, I thought you might appreciate getting a jump start with some information that could make the whole experience a happy one for everyone.

Via.
  1. Pack light. It really is an art form sometimes, but carefully planning out what you are bringing can really make everything go more smoothly. I like to lay out the clothes everyone needs day by day with only one set of spares. This way, I don't have to pack anything more than what is necessary. Try to mix and match to keep everyone's wardrobe pared down and minimalistic. There is really no sense in hauling around your whole house, especially with weather reports that can really give you a good idea of what you're in for.
  2. Pack well. The more you can do to be organized before you leave, the less frantically you'll have to burrow through the trunk to find the diapers in an emergency. When you do pack up the car, make sure anything you might need to access during the journey is on top, so you don't have to unload everything to get to some spare clothes or a favorite toy.
  3. Choose good snacks. I avoid anything chocolate because it's really messy, especially in a car or in little hands where it's likely to melt.  I also am very concientious about choosing snacks that are not high in sugar, fat, or salt, because they are more likely to cause upset tummies. And babies with upset tummies are not happy travelers. And parents with unhappy babies are also not happy travelers. So thinking about what you eat is important. And don't forget to keep the kiddos well hydrated!
  4. Use overnight diapers to keep leaks during the trip to a minimum. 
  5. Bring a special bag that is full of car entertainment. Coloring books and crayons are good, finger puppets, small stuffed animals, plastic figurines or cars and books are all great. Distribute the toys over time, not all at once. When the kiddos get bored with something, reach into the fun bag and bring out something new. They'll be thrilled. 
  6. Learn some songs or bring CDs with lots of kid friendly music that you (the driver) can stand to listen to. Our girls love to sing and they are pretty content to sing their little hearts out just about the whole drive.
  7. Ziplock bags are your best friend. I use them for everything. I use sandwich size bags for snacks to help keep crumbiness down (although crumbs still happen). They are also great for holding just a few crayons, so the whole box doesn't end up scattered around the car. I use gallon size bags to pack up diapers and wipes and keep them handy in the car. I also use gallon bags to keep a spare change of clothes handy. And having other bags on hand is good, too. We always bring along little garbage bags for dirty/wet clothes, diapers, and all that other fun stuff. 
  8. Plan for breaks. Everyone needs to stretch their legs, go to the bathroom and get some fresh air every few hours. If you're going on a trip you haven't taken before, look ahead for major cities or stopping points so you know how long each leg of the journey is going to be. 
  9. Don't be afraid to repack if you have multiple destinations. At the end of our Cascade Lake trip we spent one night in Boise before heading back. We repacked a smaller bag with only what we would need for that night and it was much easier than hauling around our big suitcase that had everything. Or, if you know ahead of time you'll be having lots of little stops, consider packing smaller bags for each destination (or using those trusty Ziplocks to separate outfits) and keeping one central bag (with all the daily necessities like toothbrushes and diapers and such).
If you do all these things, you might not even need an iPad or DVD player. We haven't used ours, although I'm not sure how long we'll be able to keep that up. 

Do you travel with your young children? Or do you stay put? If you do travel, do you have additional tips? I'd love to hear them!

Monday, July 16, 2012

The One With the Chalk Block City

My sweet little nephew, Liam, turned one a few days ago. I've been thinking about what to get him for a while now, wanting to come up with the perfect little present. With a little help from a Babble post about multiple uses for chalkboard paint, I came up with idea of making a city of blocks painted with chalkboard paint so he could change them up whenever he wanted. I'm so happy with how they turned out!

Some of the pieces are just generic city skyline buildings, but I thought it would be fun to make a Stark tower like the one in The Avengers.  Of course, it's nowhere near an exact replica... but I think the idea comes across. There's also a rendition of the Empire State Building and, for the birthday boy, Liam's Library and Observatory. And there's a little apartment building meant to look like a Brownstone.


 If you would like to make some yourself, you will need
  • Wooden block pieces, of varying shapes and sizes. (Most of the buildings were created by putting together more than one block.)
  • Sandpaper (I purchased a General Use pack with sandpapers of varying grits)
  • Chalkboard Spray Paint (I used Rust-Oleum Chalkboard Spray)
  • Chalk and/or Chalk Marker
Collect your wood pieces. You could cut your own, use an old block set, or get some from a local crafter's store (like Scrap in Portland). I planned out what I wanted ahead of time to make sure I had all the pieces I wanted. Sand your wood blocks, first with a coarse sand paper and then with a finer one, being sure to eliminate the possibility of splinters. Spray paint your blocks in 3-4 coats, over two days. In between coats, rotate your blocks to make sure you get all sides. Also be sure to use your fine sand paper to sand away paint drips. Allow your blocks to dry for several hours in between coats.

Once your chalkboard paint is applied and dried, draw on your blocks however you like. Chalk Markers are easier to use for more detailed pieces, but the Chalk Marker is harder to remove than regular chalk, just so you know.
To present this gift, I found a bucket (although I would have preferred a closed container) that fit all the blocks and also supplied some regular and colored chalk so the birthday boy can color to his heart's content. I hope he enjoys them as much as I enjoyed making them!

Sunday, July 15, 2012

Speechless Sunday


I love Audrey Hepburn. She said a lot of good things. And I thought this one was particularly appropriate as I'm driving back from a friend's wedding today. 

Friday, July 13, 2012

The One With the Portland Art Museum Tour

I've mentioned before that I've been taking some photo tours with Jennifer Costello to try and improve my skills. She won't be offering them anymore after this month, so I wanted to squeeze in one final session with her before that. My final tour focused on low light photography at the Portland Art Museum.

My friend Stephanie (you may remember her from this post), went with me because I won a free one. We had so much fun trapsing about the Museum. It was really too bad we had to leave early.


If you've never been to the Portland Art Museum you should go. For a few more weeks they have an exhibit on Californian Impressionists that is pretty cool. I'm a big fan of impressionism. It's my favorite. What about you? What's your favorite genre of art?

Thursday, July 12, 2012

The One With the Vacation Recap

Yeah... so I already did this Instagram style. But I took a few pictures on my DSLR I wanted to share. Fun stuff.
Livvy enjoying her Stars and Stripes Cupcake
Fireworks over the lake. Boats glimmering on the water. My favorite way to spend the 4th.
Teeny tiny little Livvy shoes
Ellie and Daddy
Mommy and Liv
Tired of looking at pictures yet? Because there's more coming up. Gotta get these down for record keeping's sake. And then soon I'll be back to more interesting posts.

The One With Liam's First Birthday Party

This is mostly for the sake of my sister-in-law, Emily. And because this kid is pretty cute!
The Birthday Boy
Big brother Cyril is ready to party
Liam's not so sure about having everyone sing to him
"Cake? Yeah, it's ok, I guess."
Mom's gotta get her instagram pics
"Yumm! Hats are much better than cake!"
Can't believe this kid is a year old already! Time is just flying by. Happy Birthday, Baby Boy!
Next up: a few more pictures from our vacation!

Tuesday, July 10, 2012

The One With the Vacation Instagram Recap

Well hello! It's been a long three weeks full of road trips, visiting family, more road trips and vacationing at the lake. It's been a lot of fun. I thought I'd share my instagram recap of the past week where we celebrated the 4th in my favorite way: at my grandparent's lake house near McCall, Idaho. If you've never been there... it's a pretty magical place, if I do say so myself.


So... a little recap, instagram style. I'll be back soon with more pictures from recent adventures and some tips on road-tripping with toddlers. Thanks for hanging in there! I'll try to be a bit more consistent over the next few weeks.
Related Posts Plugin for WordPress, Blogger...