So I turned to one of my favorite bloggers, Katie from Bower Power. She has put up a few tutorials that are very helpful for little aspiring photographers like me. She is leaps and bounds ahead of me, of course, but her helpful hints are just what I was looking for. I started out with her tutorial "Eye Boost" and will be tackling the others in my spare time in the weeks ahead. I'd like to be as prepared as possible to take great newborn pictures of the new baby.
I started out by downloading the Photoshop actions for Adobe CS provided by the wonderful Pioneer Woman. They are a great little set to get anyone started.
I mostly used the "Bring On they Eyes" and "Sharpen This" actions according to the directions provided by Katie in the "Eye Boost" tutorial. After using these actions, I decreased the layer opacity - sometimes significantly - in order to make sure the eyes didn't look too creepy. That would be sad.
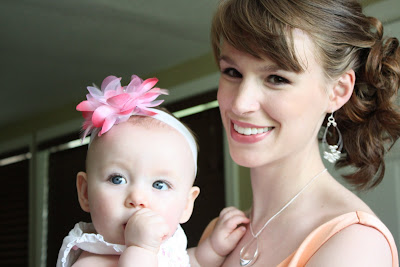
All of the before and after shots I provided for this post had been previously edited with coloring, etc. So, this is mostly just showing the eye enhancement.
Scrunch nose before:
 And after: Just a little bit of sharpening and her eyes really pop!
 Valentine's baby before:
 And after:
 Baby Cyril before:
 And after:
 Tutu cute before:
 And after:
 Flower girl before:
 And after:
 Valerie before:
 And after:
 And again:
 And after:
 Although I love this picture, I realize that the over-exposure is unfortunate. But in some ways, I don't mind the uber glow... I just wish Ellie wasn't quite so washed out.
 But a little sharpening and voila! Her sparkly eyes are more defined and that sort of makes up for the extra glow.

The difference is subtle but impressive. I'm so excited I learned how to do this! I have always been wondering how people get little baby eyes to look so striking.
It's little steps towards improving my photography skills, but it's fun!
P.S. If you're using Photoshop Elements, the actions above will not work. Download the actions for Elements here.
I started out by downloading the Photoshop actions for Adobe CS provided by the wonderful Pioneer Woman. They are a great little set to get anyone started.
I mostly used the "Bring On they Eyes" and "Sharpen This" actions according to the directions provided by Katie in the "Eye Boost" tutorial. After using these actions, I decreased the layer opacity - sometimes significantly - in order to make sure the eyes didn't look too creepy. That would be sad.
All of the before and after shots I provided for this post had been previously edited with coloring, etc. So, this is mostly just showing the eye enhancement.
Scrunch nose before:
 And after: Just a little bit of sharpening and her eyes really pop!
 Valentine's baby before:
 And after:
 Baby Cyril before:
 And after:
 Tutu cute before:
 And after:
 Flower girl before:
 And after:
 Valerie before:
 And after:
 And again:
 And after:
 Although I love this picture, I realize that the over-exposure is unfortunate. But in some ways, I don't mind the uber glow... I just wish Ellie wasn't quite so washed out.
 But a little sharpening and voila! Her sparkly eyes are more defined and that sort of makes up for the extra glow.
The difference is subtle but impressive. I'm so excited I learned how to do this! I have always been wondering how people get little baby eyes to look so striking.
It's little steps towards improving my photography skills, but it's fun!
P.S. If you're using Photoshop Elements, the actions above will not work. Download the actions for Elements here.
